Latest News
Voters approve wakesurfing ban
Aug 01, 2025

The July 31 referendum in Kent, Warren and Washington banned wakesurfing on Lake Waramaug.
Photo by Alec Linden
The sport of wakesurfing is now banned on lake Waramaug as the result of a decisive tri-town vote held on Thursday, July 31.
Voters in Kent, Warren and Washington, the three towns that border Lake Waramaug, approved the ordinance with 1452 residents ultimately voting in favor of banning the sport against 421 opposed to it.
Kent had the steepest margin in favor of the ordinance, which had to be voted through by all three towns to take effect. About 83% of Kent residents voted for the ban, totaling 468 yeses. Only 96 voted no.
In Washington, 649 voted in favor and 186 voted in opposition. Warren, the closest vote, saw 335 yes votes and 139 no.
The ordinance, which was drafted over the course of several years by the Lake Waramaug Authority, holds that any boats which operate in “surf mode,” meaning they draw water into the ballasts to create larger wakes, will be fined $250 per infraction. Wakesurfing differs from wakeboarding in that the boats move slowly, with ballast weight, to create a larger wave for participants to surf on behind the boat.
Wakesurfing is the only activity regulated by the ban.
The ordinance has been the subject of contentious public discourse for months, with sparring road signs lining streets in the three towns. Proponents of the ban have cited potential ecological damage and public safety as reasons to end the sport on the lake, while opponents have decried the action as an unnecessary and drastic infringement on resident’s right to recreate.
On vote night in Washington, resident Craig Wilbur stated he was voting no on the ban, describing it as “an overreach.”
“The lake seems like it’s the healthiest it’s ever been,” he added. His young daughter chimed in: “All boats make waves.”
Another voting resident, Lila Nelson, went the other way, stating that she felt the lake was too small to accommodate the activity. “There are a lot of big lakes around here where you can go wakesurfing,” she said, listing Candlewood Lake and Bantam Lakes as two larger alternatives.
Keep ReadingShow less

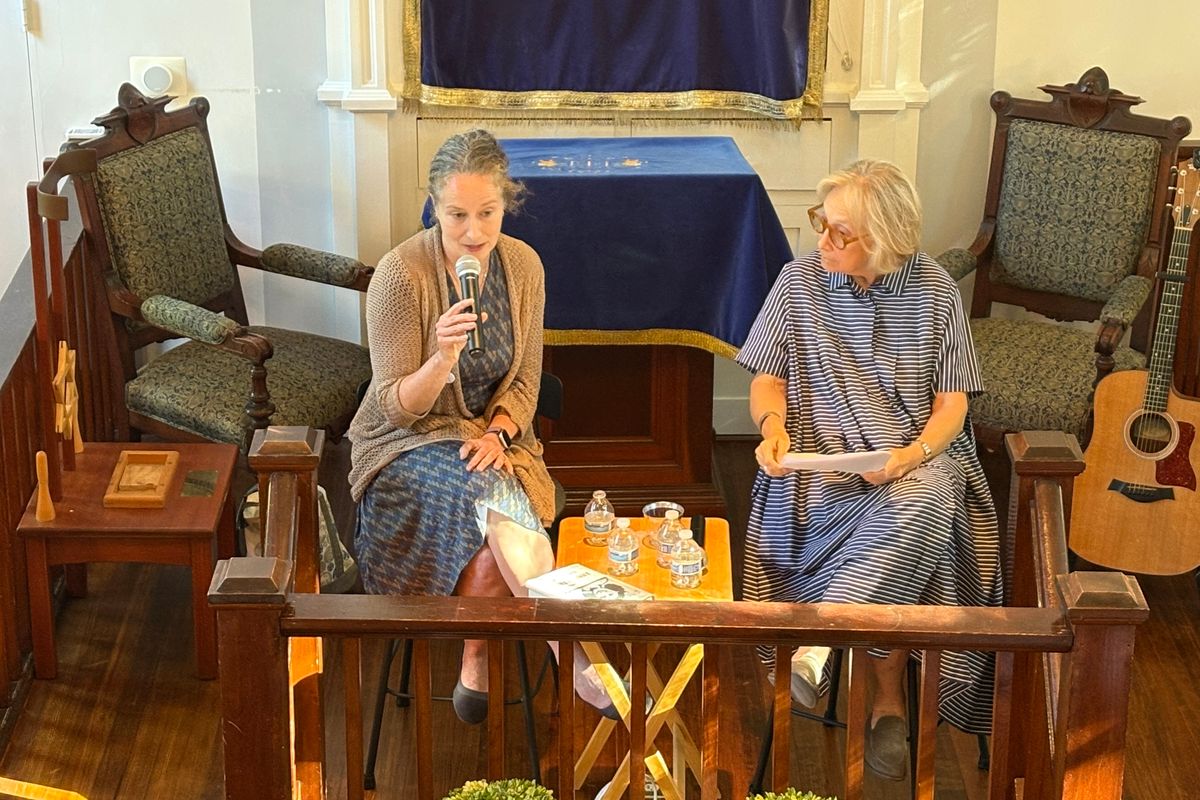
Ruth Franklin and Ileene Smith in conversation at Congregation Beth David in Amenia.
Natalia Zukerman
Congregation Beth David in Amenia hosted a conversation on the enduring legacy of Anne Frank, one of the 20th century’s most iconic figures. Ruth Franklin, award-winning biographer and critic, shared insights from her highly acclaimed book “The Many Lives of Anne Frank” with thought-provoking questions from Ileene Smith, Editorial Director of the Jewish Lives series. This event, held on July 23 — the date Anne Frank would have turned 96 — invited the large audience to reconsider Anne Frank not just as the young writer of a world-famous diary, but as a cultural symbol shaped by decades of representation and misrepresentation.
Franklin and Smith dove right in; Franklin reading a passage from the book that exemplified her approach to Anne’s life. She described her work as both a biography of Anne Frank and a cultural history of the diary itself, a document that has resonated across the world.
“The diary,” Franklin explained, “has been appropriated in ways that sometimes obscure the reality of who she was and the historical context of her life.” By weaving together different perspectives, including testimonies from those who knew Anne or whose lives were shaped by her, Franklin sought to rehumanize a figure who has, for better and worse, been turned into a symbol.
Franklin’s book examines the many faces of Anne Frank that have appeared in the public consciousness: the girl whose diary became a universal symbol of the Holocaust, the teenage diarist whose words offer an optimistic glimpse of humanity, and the historical figure whose Jewish identity has at times been obscured in favor of a broader, universal message. Franklin highlighted how Anne’s legacy was shaped by her father, Otto Frank. Many of Otto’s decisions have been viewed as controversial such as removing passages that could have alienated potential readers. While often criticized, Franklin suggested that his editorial work was driven by the desire to reach the broadest possible audience.
“I think we have to be so generous in thinking about Otto Frank and the choices that he made,” said Franklin. “He made the decision that he wanted the diary to be read by the greatest number of people possible. He wanted Anne’s message to go out into the world and work, as he said, against prejudice, understood in the widest possible sense. The Anne Frank House today in Amsterdam is carrying on his mission in making Anne’s story relatable and accessible and comparing it to many other different kinds of prejudice around the world. Not everybody agrees with this approach, but that’s what he decided to do.”
The conversation turned to a quote from author Cynthia Ozick, who argued that Anne’s story has been “vulgarized, distorted, and infantilized” in adaptations of the diary, particularly those created for mass consumption. While acknowledging the validity of Ozick’s concerns, Franklin pushed back. The desire to make Anne’s story accessible to a global audience, Franklin suggested, began with Anne herself, who rewrote her diary with an eye toward future readers who might not understand her specific historical context.
The conversation also delved into the profound grief and ambivalence Otto Frank must have felt as he worked to preserve his daughter’s legacy. Franklin’s expressed deep empathy for him, burdened with making Anne’s diary into something more than a personal testament. “He was working with a tragic loss, with an immense responsibility,” Franklin noted.
The evening’s discussion expanded to include the contentious debate over the graphic version of Anne Frank’s diary, which has been banned in several U.S. states. Critics of the graphic adaptation have condemned it for including depictions of Anne’s developing sexuality, citing them as “pornographic.” Franklin pointed out that this outrage stems from “the intersection of homophobia and anti-Semitism” in today’s political climate, highlighting how Anne’s legacy continues to be embroiled in ongoing cultural and political struggles. “The books that are most frequently banned in the country right now are those that have to do with LGBTQ content.This is a serious issue of the Republican Party persecuting gay people and trans people more generally,” said Franklin.
Smith pointedly asked Franklin about what is widely considered the most famous quote from the diary: “In spite of everything, I still believe that people are really good at heart.” Franklin responded, “In many ways, Anne Frank was an optimistic person and that quote is an accurate reflection of who she was. At the same time, that quote is incomplete. It actually comes in the middle of a much longer passage in which she describes feeling hopeless about the future of the world.” Franklin continued, “That quote is often dismissed by Holocaust scholars or other people who have said with a lot of confidence that if Anne Frank had survived the camps to write about it, she would no longer have believed that people are truly good at heart. My own position, which is the perspective I adopt in this book, is that none of us can know what a surviving Anne Frank would have thought about anything at all, and it is irresponsible to speculate about it.We simply can’t go there. “
As the conversation concluded, the room was filled with a sense of reflection and appreciation. The crowd was invited to continue the conversation in the Community Room, where Franklin signed copies of her book, which were available through Oblong Books. Her visit left attendees with much to ponder about how we interpret history, memory, and the cultural artifacts that endure.
Keep ReadingShow less

Yuja Wang performs with the TMCO and Andris Nelsons.
Hilary Scott
Sunday, July 20 was sunny and warm. Nic Mayorga, son of American concert pianist, the late Lincoln Mayorga, joined me at Tanglewood to hear Yuja Wang play Prokofiev’s Piano Concerto No. 2 in G minor, Op. 16. I first saw Wang on July 8, 2022, when she filled in for Jean-Yves Thibaudet on the opening night of Tanglewood’s summer season. She virtually blew the shed down with her powerful and dynamic playing of Liszt’s Piano Concerto No. 1.
Nic was my guest last season on July 13, when Wang wowed us with her delicate interpretation of Beethoven’s Piano Concerto No. 4. We made plans on the spot to return for her next date in Lenox.
As we found our seats there was a buzz in the Shed. A huge crowd had gathered. Nic went for tall cans of cold mineral water — essential. The Tanglewood Music Center Orchestra was on stage. The door opened, and out stepped Wang in a brilliant shear and sparkling silvery light dress befitting the warm day. Conductor Andris Nelsons followed. They greeted concertmaster Nathan Cole, and settled in.
The first movement, an Andandtino -Allegretto - Andandtino, is one where a 22-year-old Prokofiev distinguishes himself as an entirely new breed of concerto composers. It is far from typical. There is no conventional drama between opposing forces of piano and orchestra — just a light, gentle phrase with intentionally muted strings (pizzicato) and clarinets, giving way to Chopin-like left-hand figures from the piano, and a lengthy, divine melody in the right. There is beauty in this.Wang is in charge.
She transitioned to a faster march section that evolved into an extended solo played with great precision and attention to detail. The soloist had the floor until a raucous return of the full orchestra, followed by a pianissimo recollection of the opening. The two great forces now united, everyone was on the edge of their seat.
The second movement is a Scherzo: Vivace. Here, Wang showed her mastery over one of the most challenging sections — a relentlessly demanding moto perpetuo where the soloist must play unbroken sixteenths, both hands, in octave unison. Nic agreed that one must see this type of playing live to fully appreciate the artist. The orchestra added wonderful, subtle color and counter moods to this virtuoso spotlight. Wang’s command of the minutest shifts in tempo was astounding. The piano, here, produces melodies but also becomes a percussion instrument of the highest order.
In the third movement, an Intermezzo: Allegro moderato, the soloist gets a breather from the speedy tempos — but not quite, as she must alternate between delicacy and great force in figures while the orchestra layers a backdrop of a heavy march. Wang displayed her versatility here, commanding the tone, volume and moods as dictated by Prokofiev’s adventuring. Tempos changed. Everything changed. Yet throughout, each mini stanza and bar stood out — authentic, independent, real. Likely exactly what Prokofiev had in mind, but likely to elude all but the finest musicians.
In the Finale: Allegro tempestoso, Prokofiev reverts to the more conventional opposition-of-forces theme — the piano trying to overwhelm the orchestra in a barrage of flittering bright passages offset by heavy-handed chords. Wang chose a more collegial approach here. She was firm but polite; it never felt like a struggle. This made the transition to the next idea — where clarinets and violas offer a contrasting tranquility — smooth as silk. The solo piano continued with elements of Russian folk music, joined by the orchestra, building intensity before another solo piano display, and then a traditional buildup to a sweeping conclusion.
I glanced over at Nic’s joy and bewilderment. A standing ovation was followed, with encore performances of selections from Sebelius’s 13 Pieces for Piano, Op. 76, No. 2: Etude; Schubert’s “Gretchen am Spinnrade,” D. 118, arranged by Liszt; and Horowitz’s Variations on a Theme from Carmen.
Prokofiev’s debut of this concerto in 1913 did not go over quite as well. Some in the audience expressed displeasure at his ideas, hissed and rushed out. But Prokofiev expressed his displeasure at their poor taste, played an encore nonetheless, and fanned the flames. Sometimes a genius from one generation is misunderstood in his time but vindicated generations later by audiences and musicians of a different era. Such is the case with Prokofiez, who had the last laugh. Yuja Wang has her place in this saga. That she performs with the young musicians of the Tanglewood Music Center Orchestra shows her generous nature and kind heart — she cares about the future of classical music.
If you are curious and like to travel, Wang will play Prokofiev’s Piano Concerto No. 2 again several times this season: Nov. 13 at The Philharmonie de Paris; Dec. 4 and 5 at The Konzerthaus, Vienna; and Dec. 12 at The Concertgebouw in Amsterdam. I highly recommend it.
Keep ReadingShow less
loading